This Post was Moved here
Here is a short post of the above one.
Step 1 : Login to Your Windows 10 PC.
Step 2 : Open Control Panel.
[See : How to Open Control Panel Easily]
Step 3 : Click on Review Your Computer Status Under Security & Maintenance.
Step 4 : Click on Maintenance on the Right Pane.
Click Start Maintenance to start Maintenance tasks immediately.
Else,
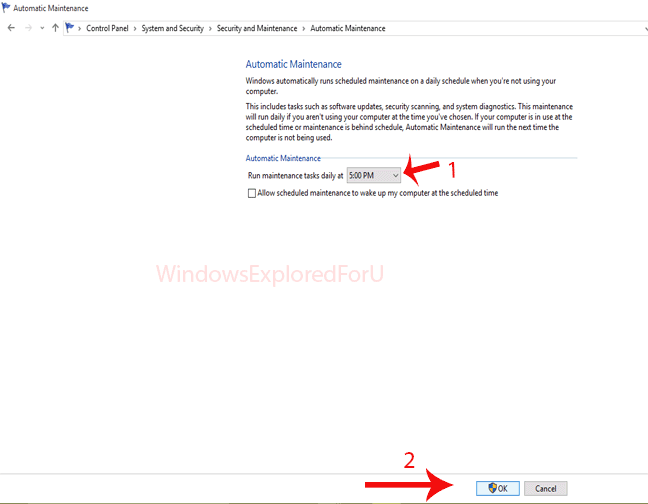
Step 5 : Click On Change Maintenance Settings.
Step 6 : Select Maintenance timing According to Your Wish.
Step 7 : Click On OK.
Step 8 : Close the Window.
That's it...

