Can't uninstall update KB3211320 that broke internet, Adobe, keyboard and many...
This week Microsoft had released an update for Windows 10 users in the name of KB3211320.
Though i was yet to install the update (i'm on Enterprise eval edition), i had seen many changes on my
friend's PC which are mostly because of bugs. Some of the notable changes are.. like
His favorite one Adobe CC 2017 worked great before that stopped working after every 5-10 minutes.,
His internet connection seemed lost when he used Microsoft Edge browser, he needs to re register
his office and many more issues like keyboard unresponsive for some time...
OK, all this happened after updating his PC to that latest update.
Unfortunately we can't uninstall the update using our regular approach because it was served on
Servicing stack update which cannot be uninstalled.
So, we followed an alternate approach, which is modifying the core elements of the update..
This allowed us to uninstall the update,
So, if you too are facing the issue then, i hope this post may be helpful for you too...
Remember following this approach is against the Microsoft terms, but since we need to use our PC
there's nothing wrong in doing something that saves our PC..
Unfortunately, i forgot to take screenshots, so i like to show through my files...
1) First, open File explorer
[Helpful link : How to open file explorer in windows 10]
2) Open your Windows installed drive, may be 'C' drive for most of the time..
3) Navigate to
C:\Windows\Servicing\Packages
Note : If your Windows was installed on a different drive like 'D' then go to
D:\Windows\Servicing\Packages
4) When you opened you will find different packages...
Click on the date modified, so that you can find the recent update..
5) On your right hand size, there will be a search box, type .mum on the field..
Now, you need to take permission for that item, for hat
6) Right click on the package-->select properties-->click on security-->
7)select advanced
8)Click on Change Permissions ->Add..
9) Click on select a principal
In the New popup that opened, and under "Enter the object name to select" box type your user name or your Microsoft email id-> Click on Check names ->If your entered name was right it will display the name, else retype the user name or id.
Check Full control checkbox, that was under the basic permissions..
10) Click on OK.
Now, near the owner box..
Click on Change-->In the New popup that opened, and under "Enter the object name to select" box type your user name or your Microsoft email id-> Click on Check names ->If your entered name was right it will display the name, else retype the user name or id.
11) Click on OK.
12) Again Apply -> OK and close the window.
You had successfully taken the ownership..
Now, we need to change the content of the file...
13) Right Click on the package -> Open With -> Select Notepad on the list ( If there is no notepad,
then click on More Apps and scroll down and select Notepad)
14) Scroll down and change
permanance=”permanent” to permanence=”removable”
15) Press Ctrl + S to save the file..
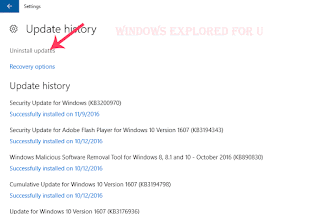
16) Now, go back to View installed updates and uninstall the update..
[See : How to uninstall update in windows 10]
That's it.
Enjoy..
This week Microsoft had released an update for Windows 10 users in the name of KB3211320.
Though i was yet to install the update (i'm on Enterprise eval edition), i had seen many changes on my
friend's PC which are mostly because of bugs. Some of the notable changes are.. like
His favorite one Adobe CC 2017 worked great before that stopped working after every 5-10 minutes.,
His internet connection seemed lost when he used Microsoft Edge browser, he needs to re register
his office and many more issues like keyboard unresponsive for some time...
OK, all this happened after updating his PC to that latest update.
Unfortunately we can't uninstall the update using our regular approach because it was served on
Servicing stack update which cannot be uninstalled.
So, we followed an alternate approach, which is modifying the core elements of the update..
This allowed us to uninstall the update,
So, if you too are facing the issue then, i hope this post may be helpful for you too...
Remember following this approach is against the Microsoft terms, but since we need to use our PC
there's nothing wrong in doing something that saves our PC..
Unfortunately, i forgot to take screenshots, so i like to show through my files...
1) First, open File explorer
[Helpful link : How to open file explorer in windows 10]
2) Open your Windows installed drive, may be 'C' drive for most of the time..
3) Navigate to
C:\Windows\Servicing\Packages
Note : If your Windows was installed on a different drive like 'D' then go to
D:\Windows\Servicing\Packages
4) When you opened you will find different packages...
Click on the date modified, so that you can find the recent update..
5) On your right hand size, there will be a search box, type .mum on the field..
Now, you need to take permission for that item, for hat
6) Right click on the package-->select properties-->click on security-->
7)select advanced
8)Click on Change Permissions ->Add..
9) Click on select a principal
In the New popup that opened, and under "Enter the object name to select" box type your user name or your Microsoft email id-> Click on Check names ->If your entered name was right it will display the name, else retype the user name or id.
Check Full control checkbox, that was under the basic permissions..
[Click on the image to view full size]
10) Click on OK.
Now, near the owner box..
Click on Change-->In the New popup that opened, and under "Enter the object name to select" box type your user name or your Microsoft email id-> Click on Check names ->If your entered name was right it will display the name, else retype the user name or id.
11) Click on OK.
12) Again Apply -> OK and close the window.
You had successfully taken the ownership..
Now, we need to change the content of the file...
13) Right Click on the package -> Open With -> Select Notepad on the list ( If there is no notepad,
then click on More Apps and scroll down and select Notepad)
14) Scroll down and change
permanance=”permanent” to permanence=”removable”
15) Press Ctrl + S to save the file..
16) Now, go back to View installed updates and uninstall the update..
[See : How to uninstall update in windows 10]
That's it.
Enjoy..


